guideline is an augmented reality tool that visually guides users through the breadboarding process. it uses advanced algorithmic reasoning to accurately breadboard an electrical component list and layers intuitive instructions on screen.
guideline started from a simple question—what if the breadboard could show you exactly what to do, right on top of it?
in order to accomplish this, we came up with a cool solution with 3 main factors:
vr headset
for the full experience of layering instructions on the physical breadboard, we needed a phone based vr viewer
data pipeline
a raw electrical component list had to be uploaded via web app and then parsed into json & passed to our mobile app
advanced algorithms
the concept requires a computation heavy computer vision pipeline—what's left is the actual logic itself. we need to detect the breadboard with opencv, apply some cool algorithms, and finally, display the vr instructions!
there are two main parts to guideline: the web app and the mobile app.
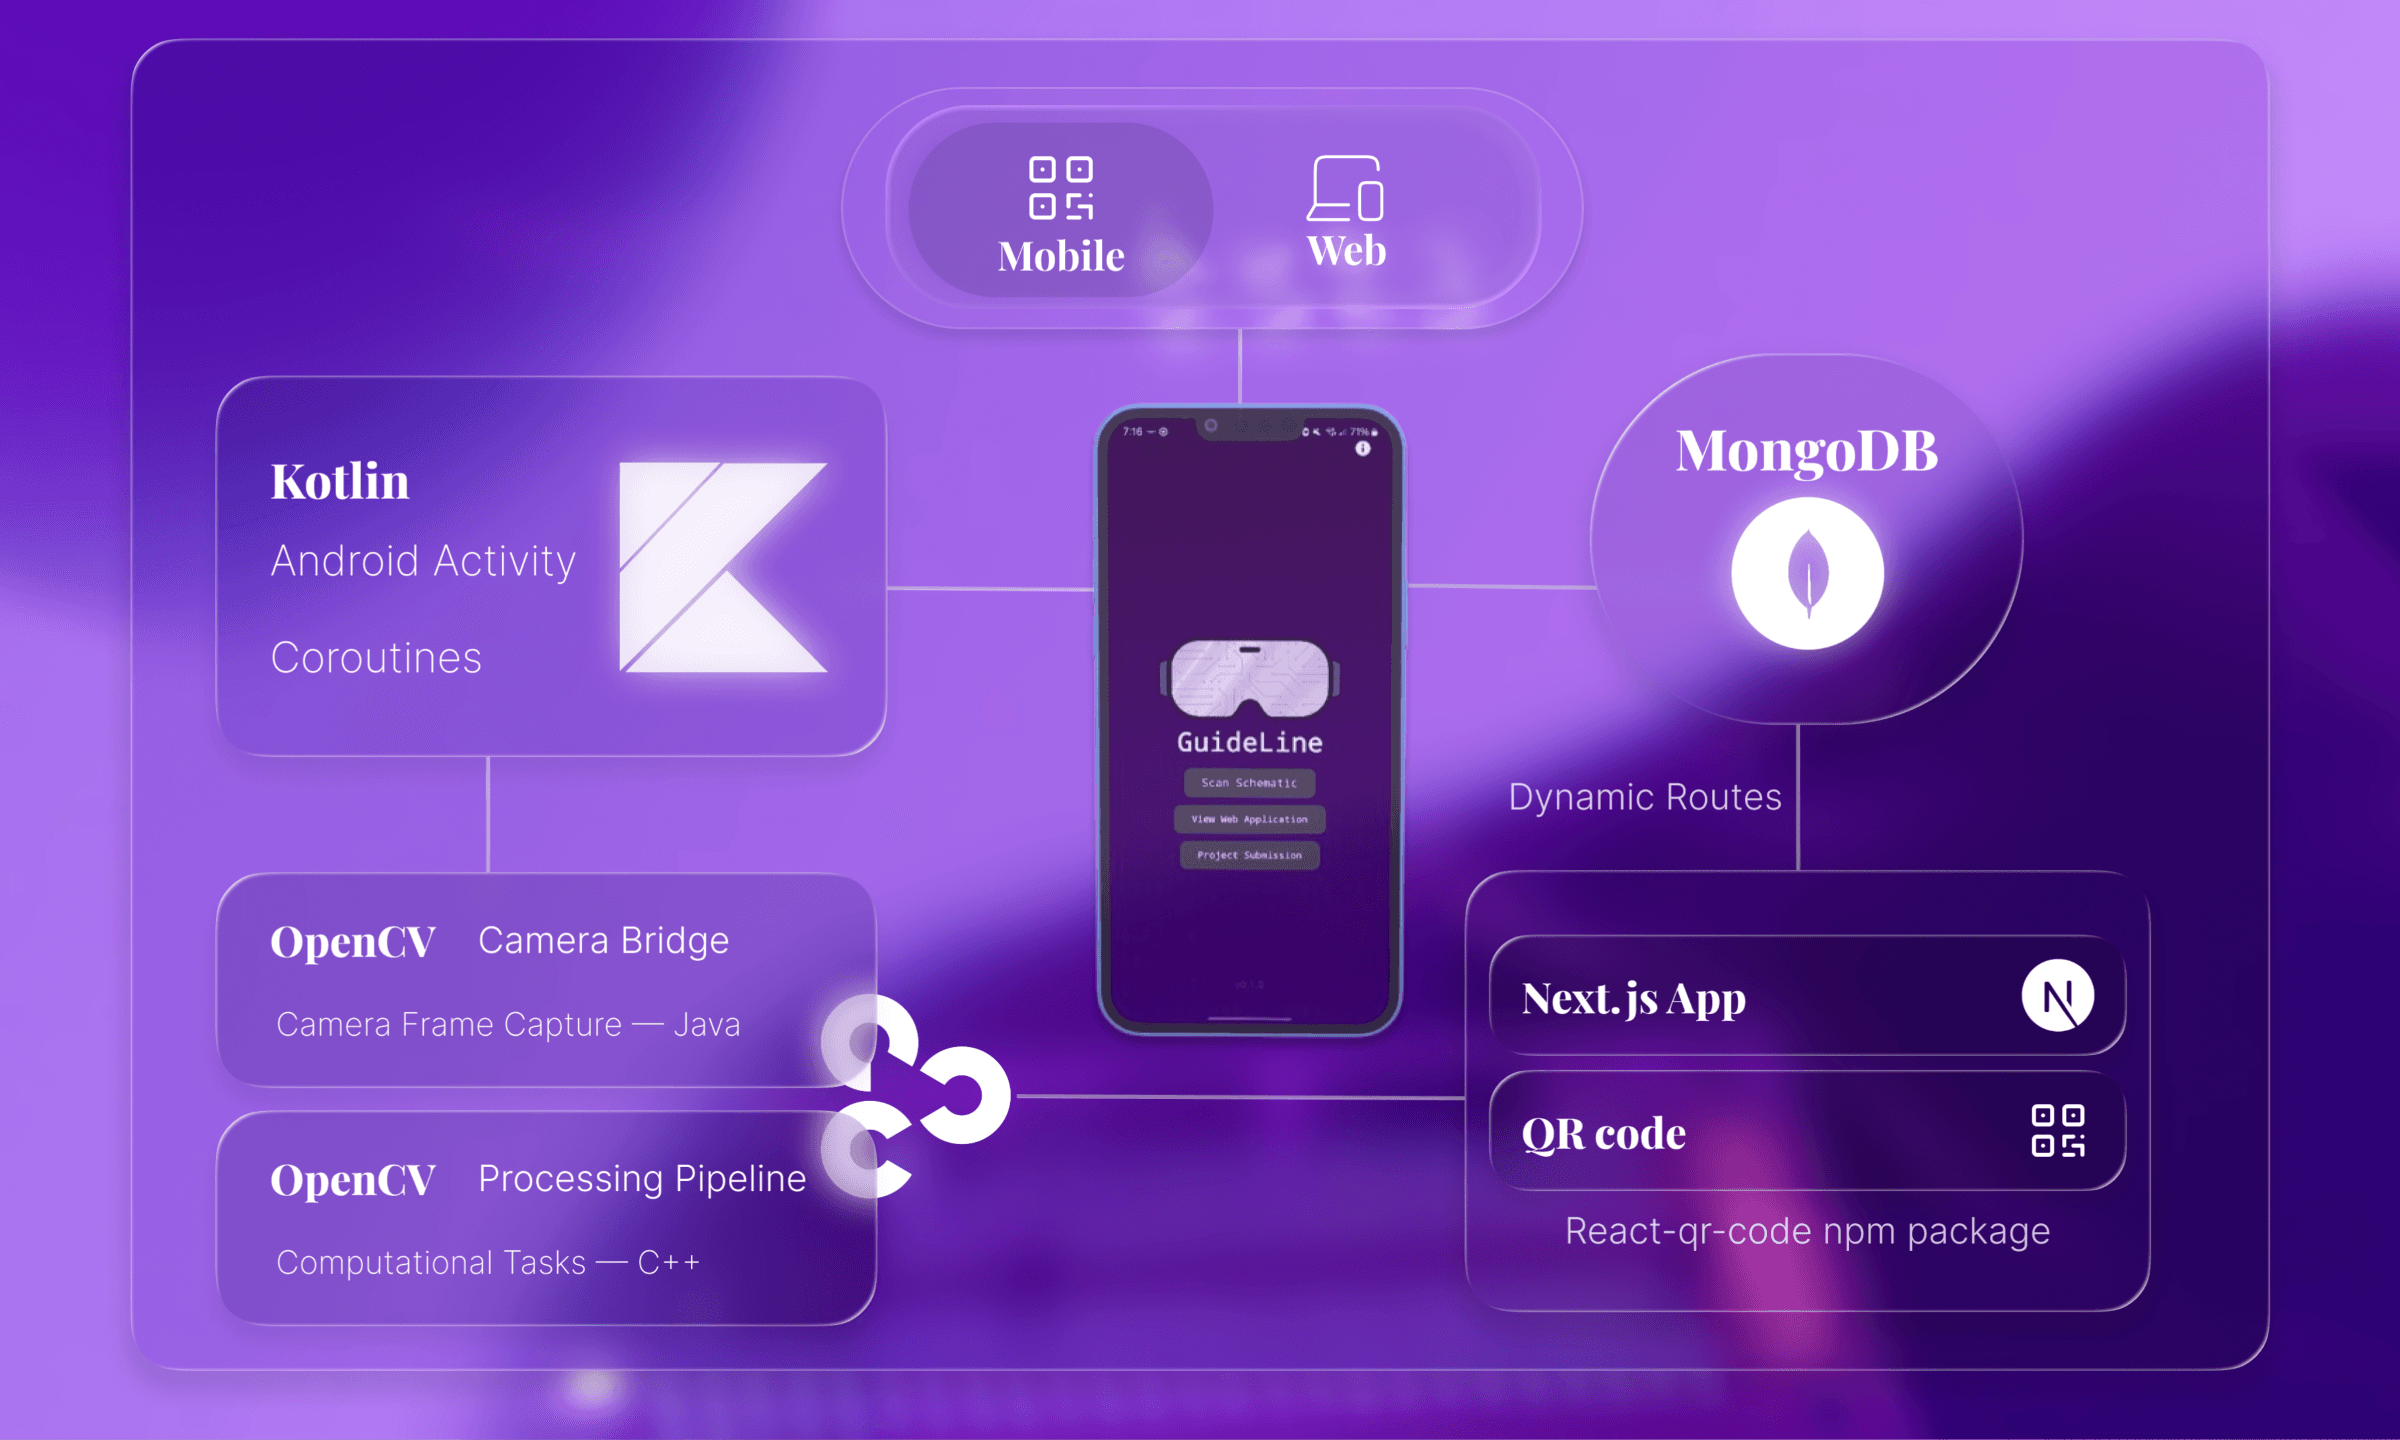
the web app accepts a component list upload, stores it in mongodb using dynamic routing, and generates a unique qr code that the mobile app can scan.
the mobile app scans the qr, downloads the parsed list, then runs a fast color-based segmentation to isolate the breadboard, estimate its corners, and flatten it to a top-down view.
histogram projections reveal the repeating hole grid so each cell can be mapped precisely. with that structure in place, the app overlays steps, components, and wiring onto each cell.
a quick next.js dynamic route integration never disappoints.
the web app's functionality is simple:take a component list, parse it, store it in a mongodb collection, and create a qr code using react-qr-code that points to the document id.
the route acts as a bridge between the qr code scan via the mobile app, and the user data.
it contains some generic next.js route handler code:
client/app/[slug]/route.tsimport { NextResponse, NextRequest } from "next/server";
import { Formatter } from "../lib/prettier";
import connectDB from "../api/db/connect";
import { ObjectId } from "mongodb";
export async function GET(
request: NextRequest,
{ params }: { params: Promise<{ slug: string }> }): Promise<NextResponse> {
const { slug } = await params;
const client = await connectDB();
try {
// minus error handling
const collection = client.db().collection("netlists");
const result = await collection.findOne({ _id: new ObjectId(slug) });
const raw = result.netlist as string;
const parsed = Formatter(raw);
return NextResponse.json({ id: slug, data: parsed });
} catch {
// ...
} finally {
await client.close();
}
}
kotlin and opencv are heavily used in the mobile app.
qr code integrationfirst, we must fetch the data! we do this with the journeyapps barcode scanner. the data is stored inside an android intent
server/app/src/ScanActivity.ktpackage com.example.guideline_mobile
import android.content.Intent
import com.journeyapps.barcodescanner.ScanContract
import com.journeyapps.barcodescanner.ScanOptions
// Register scanner
private val barcodeLauncher = registerForActivityResult(ScanContract()) { result ->
if (result.contents != null) {
val intent = Intent()
intent.putExtra("SCAN_RESULT",result.contents)
// cleanup
}
}
// Launch scanner
val options = ScanOptions().apply {
setPrompt("Scan A QR Code")
}
barcodeLauncher.launch(options)
once we have the qr code, we need to fetch the circuit data from our server. we use kotlin coroutines to handle this asynchronously without blocking the ui.
server/app/src/MainActivity.ktimport androidx.compose.runtime.rememberCoroutineScope
import kotlinx.coroutines.launch
val coroutineScope = rememberCoroutineScope()
val scanLauncher = rememberLauncherForActivityResult(
contract = ActivityResultContracts.StartActivityForResult()
) { result ->
if (result.resultCode == Activity.RESULT_OK) {
val scanContent = result.data?.getStringExtra("SCAN_RESULT")
// Launch coroutine to fetch circuit data
coroutineScope.launch {
linkReader(scanContent, context)
}
}
}
rememberCoroutineScope() creates a coroutine scope that's tied to the composable's lifecycle - it automatically cancels when the composable leaves the screen.
coroutineScope.launch kicks off the network request without blocking the ui thread.
fetching circuit datathe linkReader() function shows kotlin coroutines in action - properly managing threads for network operations and ui updates.
server/app/src/MainActivity.ktwithContext(Dispatchers.IO) {
urlConnection = url.openConnection() as HttpURLConnection
val response = BufferedReader(InputStreamReader(urlConnection.inputStream)).readText()
withContext(Dispatchers.Main) {
val arPage = Intent(context, ARActivityOne::class.java)
arPage.putExtra("jsonData", response)
context.startActivity(arPage)
}
}
withContext(Dispatchers.IO) moves the network call off the main thread.
Dispatchers.Main prevents the app from freezing during network requests.
augmented reality!this is where it gets fun and processing intensive, andy did most of the heavy lifting on 1 hour of sleep.
 there is around 2k lines of logic in AR.kt and it's more complex than what i'm going to describe but i'll keep it simple. 1 | detecting the breadboard in frame
the first challenge: finding a white breadboard in frame and getting a normalized top-down view.
server/app/src/AR.kt// HSV thresholding to isolate white breadboard
val lowerWhite = Scalar(0.0, 0.0, 200.0)
val upperWhite = Scalar(180.0, 50.0, 255.0)
val mask = Mat()
Core.inRange(hsv, lowerWhite, upperWhite, mask)
// Find largest contour (assumed to be breadboard)
var maxContour: MatOfPoint? = null
var maxArea = 0.0
for (contour in contours) {
val area = Imgproc.contourArea(contour)
if (area > maxArea) {
maxArea = area
maxContour = contour
}
}
we threshold for white objects with opencv (low saturation, high value in hsv), then find the biggest blob. morphological operations clean up the noise before contour detection.
2 | perspective transform logiconce we have the four corners, we warp the breadboard into a flat rectangle. this makes grid detection consistent regardless of camera angle.
server/app/src/AR.ktprivate fun applyPerspectiveTransform(source: Mat, corners: Array<Point>): Mat {
val sortedCorners = sortPoints(corners)
val dstPoints = arrayOf(
Point(0.0, 0.0), // top-left
Point(NORMALIZED_WIDTH - 1.0, 0.0), // top-right
Point(NORMALIZED_WIDTH - 1.0, NORMALIZED_HEIGHT - 1.0),
Point(0.0, NORMALIZED_HEIGHT - 1.0) // bottom-left
)
val transformMatrix = Imgproc.getPerspectiveTransform(srcMat, dstMat)
// Store inverse for mapping points back to original view
inverseTransformMatrix = Imgproc.getPerspectiveTransform(dstMat, srcMat)
val warped = Mat()
Imgproc.warpPerspective(
source, warped, transformMatrix,
Size(NORMALIZED_WIDTH.toDouble(), NORMALIZED_HEIGHT.toDouble())
)
return warped
}
problem: we detect grid points in the warped rectangle, but need to draw highlights in the original camera frame.
our solution was using the inverse perspective transform, which maps coordinates back using homogeneous coordinates.
3 | grid detection with histogram analysisnext, we must find where the holes exist on the breadboard, which are the intersection of rows and cols. histogram projection counts white pixels in each row and column, smooth the signal with gaussian filtering and find peaks (the intersection points).
server/app/src/AR.ktprivate fun detectBreadboardGridRobust(warped: Mat): Pair<List<Line>, List<Line>> {
// Binary threshold the warped image
val binary = Mat()
Imgproc.adaptiveThreshold(
blur, binary, 255.0,
Imgproc.ADAPTIVE_THRESH_GAUSSIAN_C,
Imgproc.THRESH_BINARY_INV, 11, 11.0
)
// Create projections - count white pixels per row/column
val horizontalProjection = IntArray(binary.height()) { 0 }
val verticalProjection = IntArray(binary.width()) { 0 }
for (y in 0 until binary.height()) {
for (x in 0 until binary.width()) {
if (binary.get(y, x)[0] > 0) {
horizontalProjection[y]++
verticalProjection[x]++
}
}
}
// Smooth and detect peaks
val smoothedHorizontal = smoothArray(horizontalProjection)
val horizontalPeaks = detectPeaks(smoothedHorizontal, binary.height())
// Convert peaks to line coordinates
val hLines = horizontalLines.map { y ->
Line(0, y, NORMALIZED_WIDTH, y)
}
return Pair(hLines, vLines)
}
now we compute every grid intersection and store it in a 2d array. this becomes our "map" of the breadboard.
server/app/src/AR.ktprivate fun createIntersectionMatrix(
warped: Mat,
horizontalLines: List<Line>,
verticalLines: List<Line>
): Array<Array<Point?>> {
val matrix = Array(horizontalLines.size) {
Array<Point?>(verticalLines.size) { null }
}
// Find all intersections
for (rowIndex in horizontalLines.indices) {
val hLine = horizontalLines[rowIndex]
for (colIndex in verticalLines.indices) {
val vLine = verticalLines[colIndex]
val intersection = findIntersection(hLine, vLine)
matrix[rowIndex][colIndex] = intersection
}
}
return matrix
}
now matrix[5][12] gives us the exact pixel coordinates of row 5, column 12.
5 | sequential pin highlightingthis is where the magic happens. the app cycles through components and their pins automatically.
server/app/src/AR.ktprivate fun processComponentHighlighting(frame: Mat) {
if (!isHighlightingActive || isComponentHighlightingPaused) return
val currentTimeMs = System.currentTimeMillis()
// Update every 1 second
if (currentTimeMs - lastUpdateTime >= PIN_HIGHLIGHT_DELAY_MS) {
clearHighlightedPoints()
val component = placements[currentComponentIndex]
if (currentPinIndex < component.positions.size) {
// Highlight current pin
val (rowIndex, colIndex) = component.positions[currentPinIndex]
highlightGridPoint(rowIndex, colIndex)
// Display component info
val text = "${component.ref} - Pin ${currentPinIndex + 1}"
displayComponentInfo(frame, text)
currentPinIndex++
} else {
// Move to next component
currentComponentIndex = (currentComponentIndex + 1) % placements.size
currentPinIndex = 0
}
lastUpdateTime = currentTimeMs
}
}
this implements a state machine that walks through each component's pins.
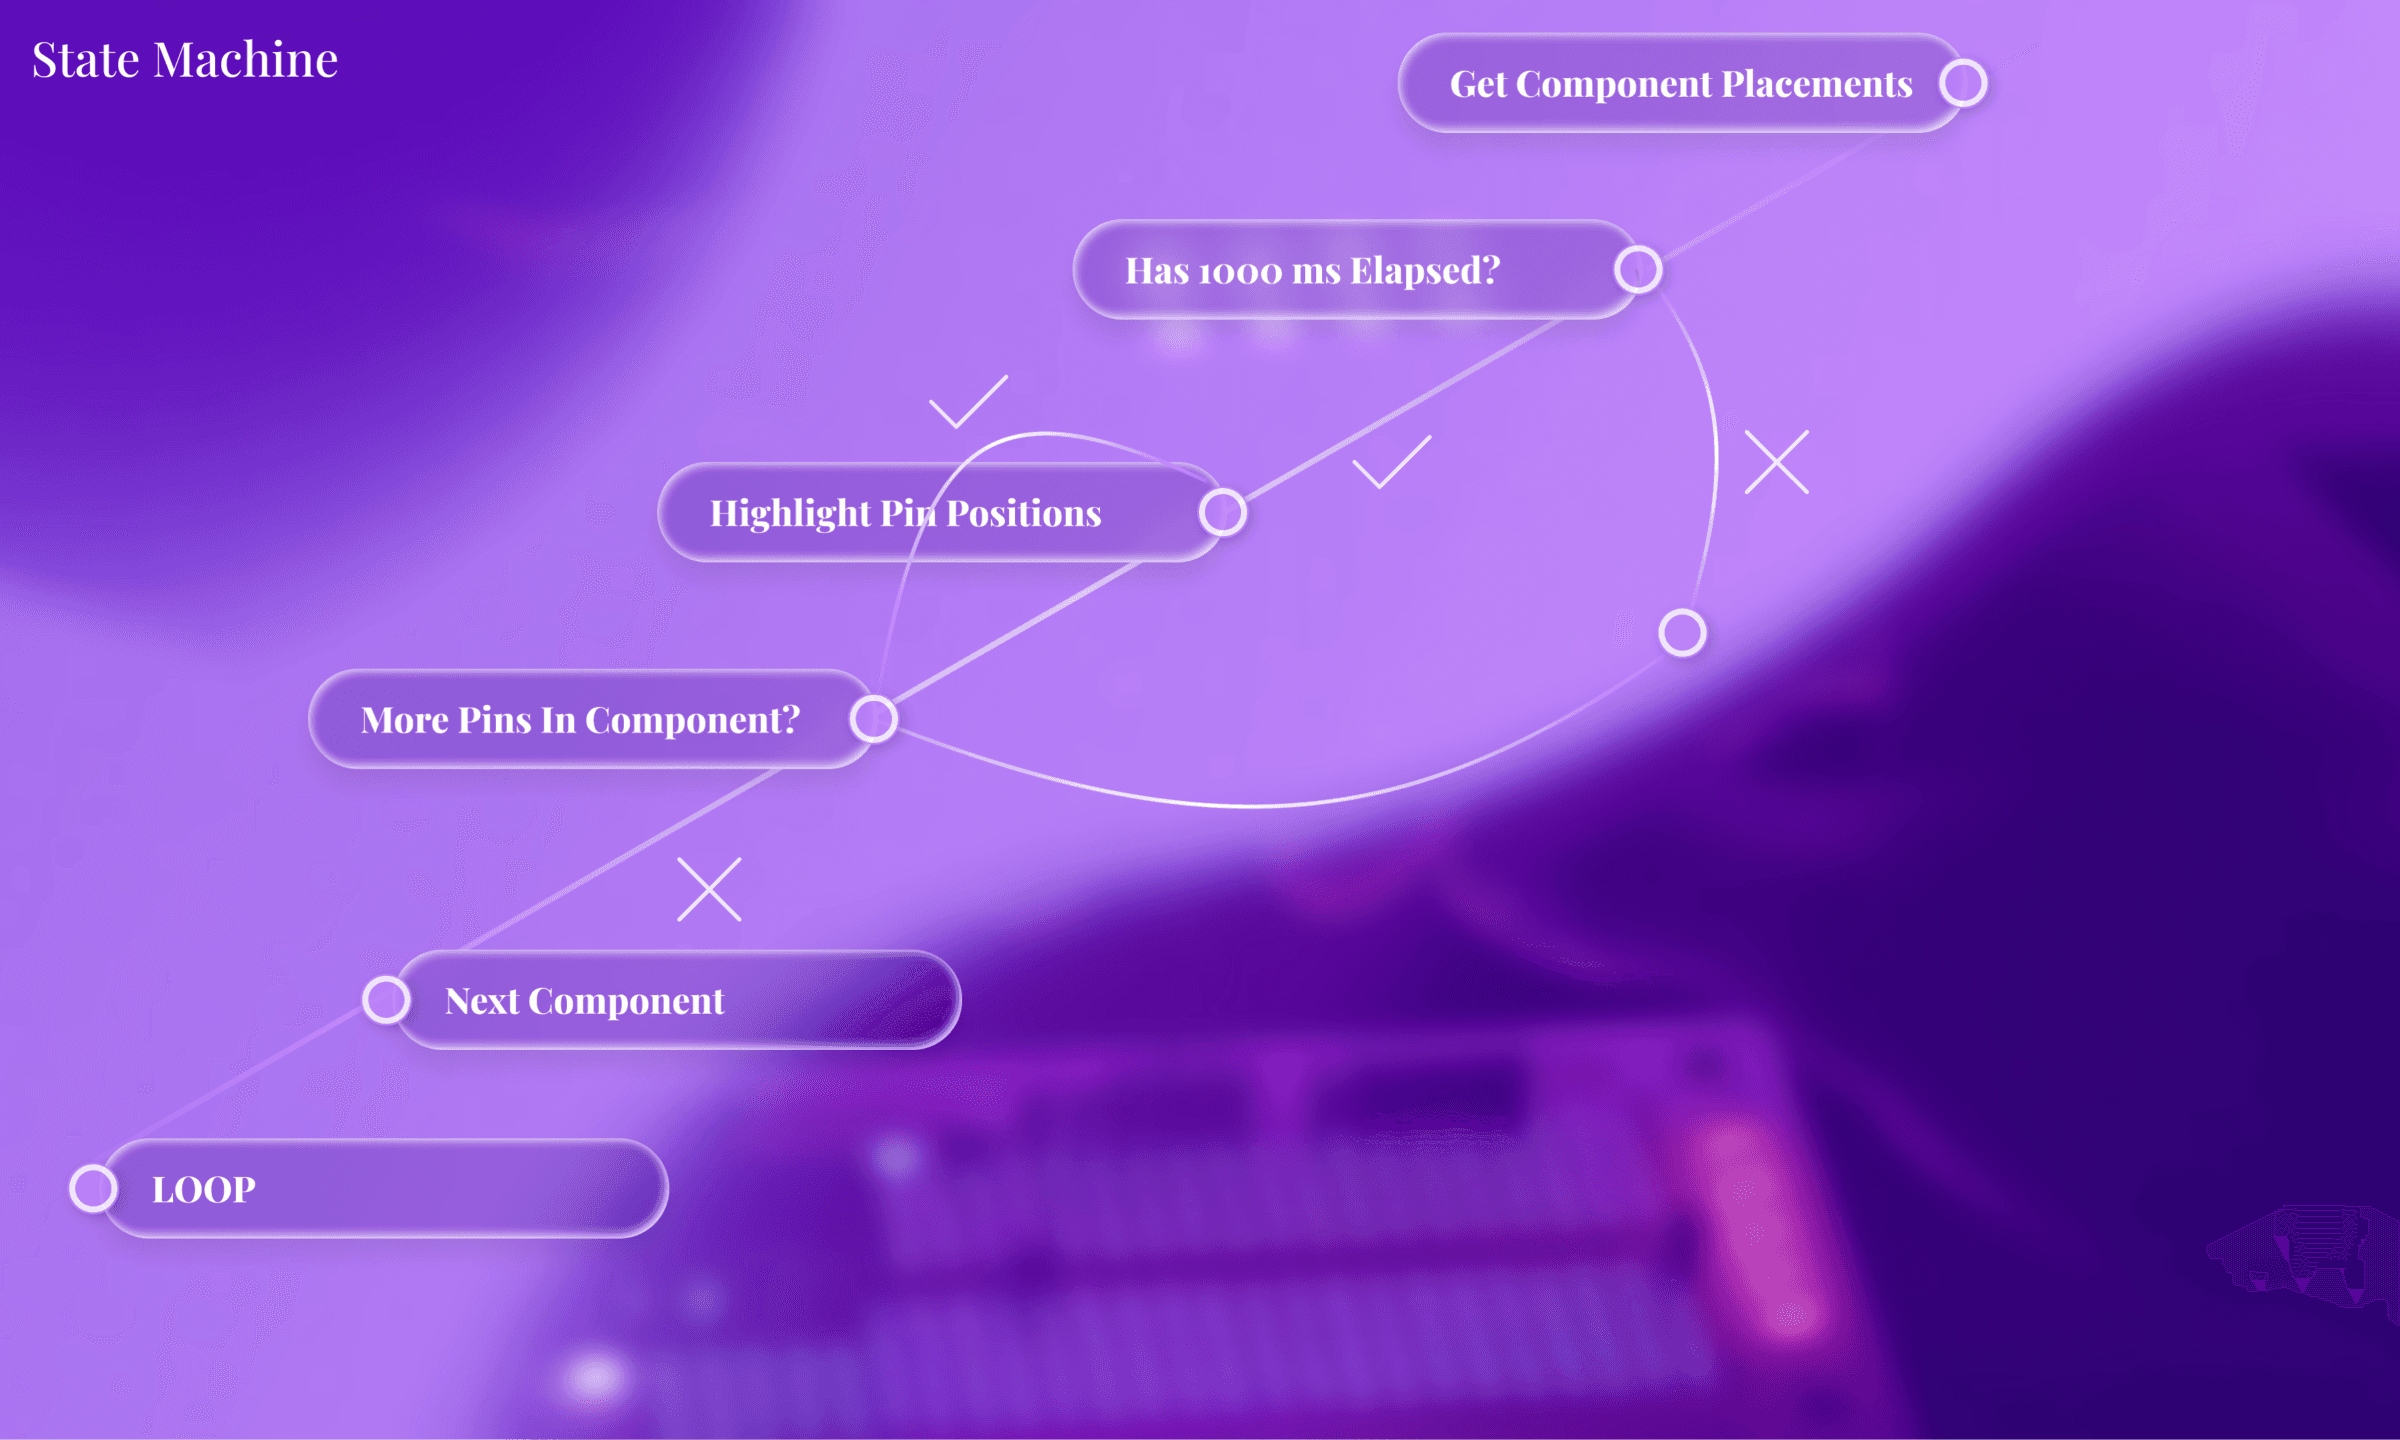
when it finishes one component, it moves to the next. when it finishes all components, it loops back. timing is controlled by checking System.currentTimeMillis() for frame-independent delays.
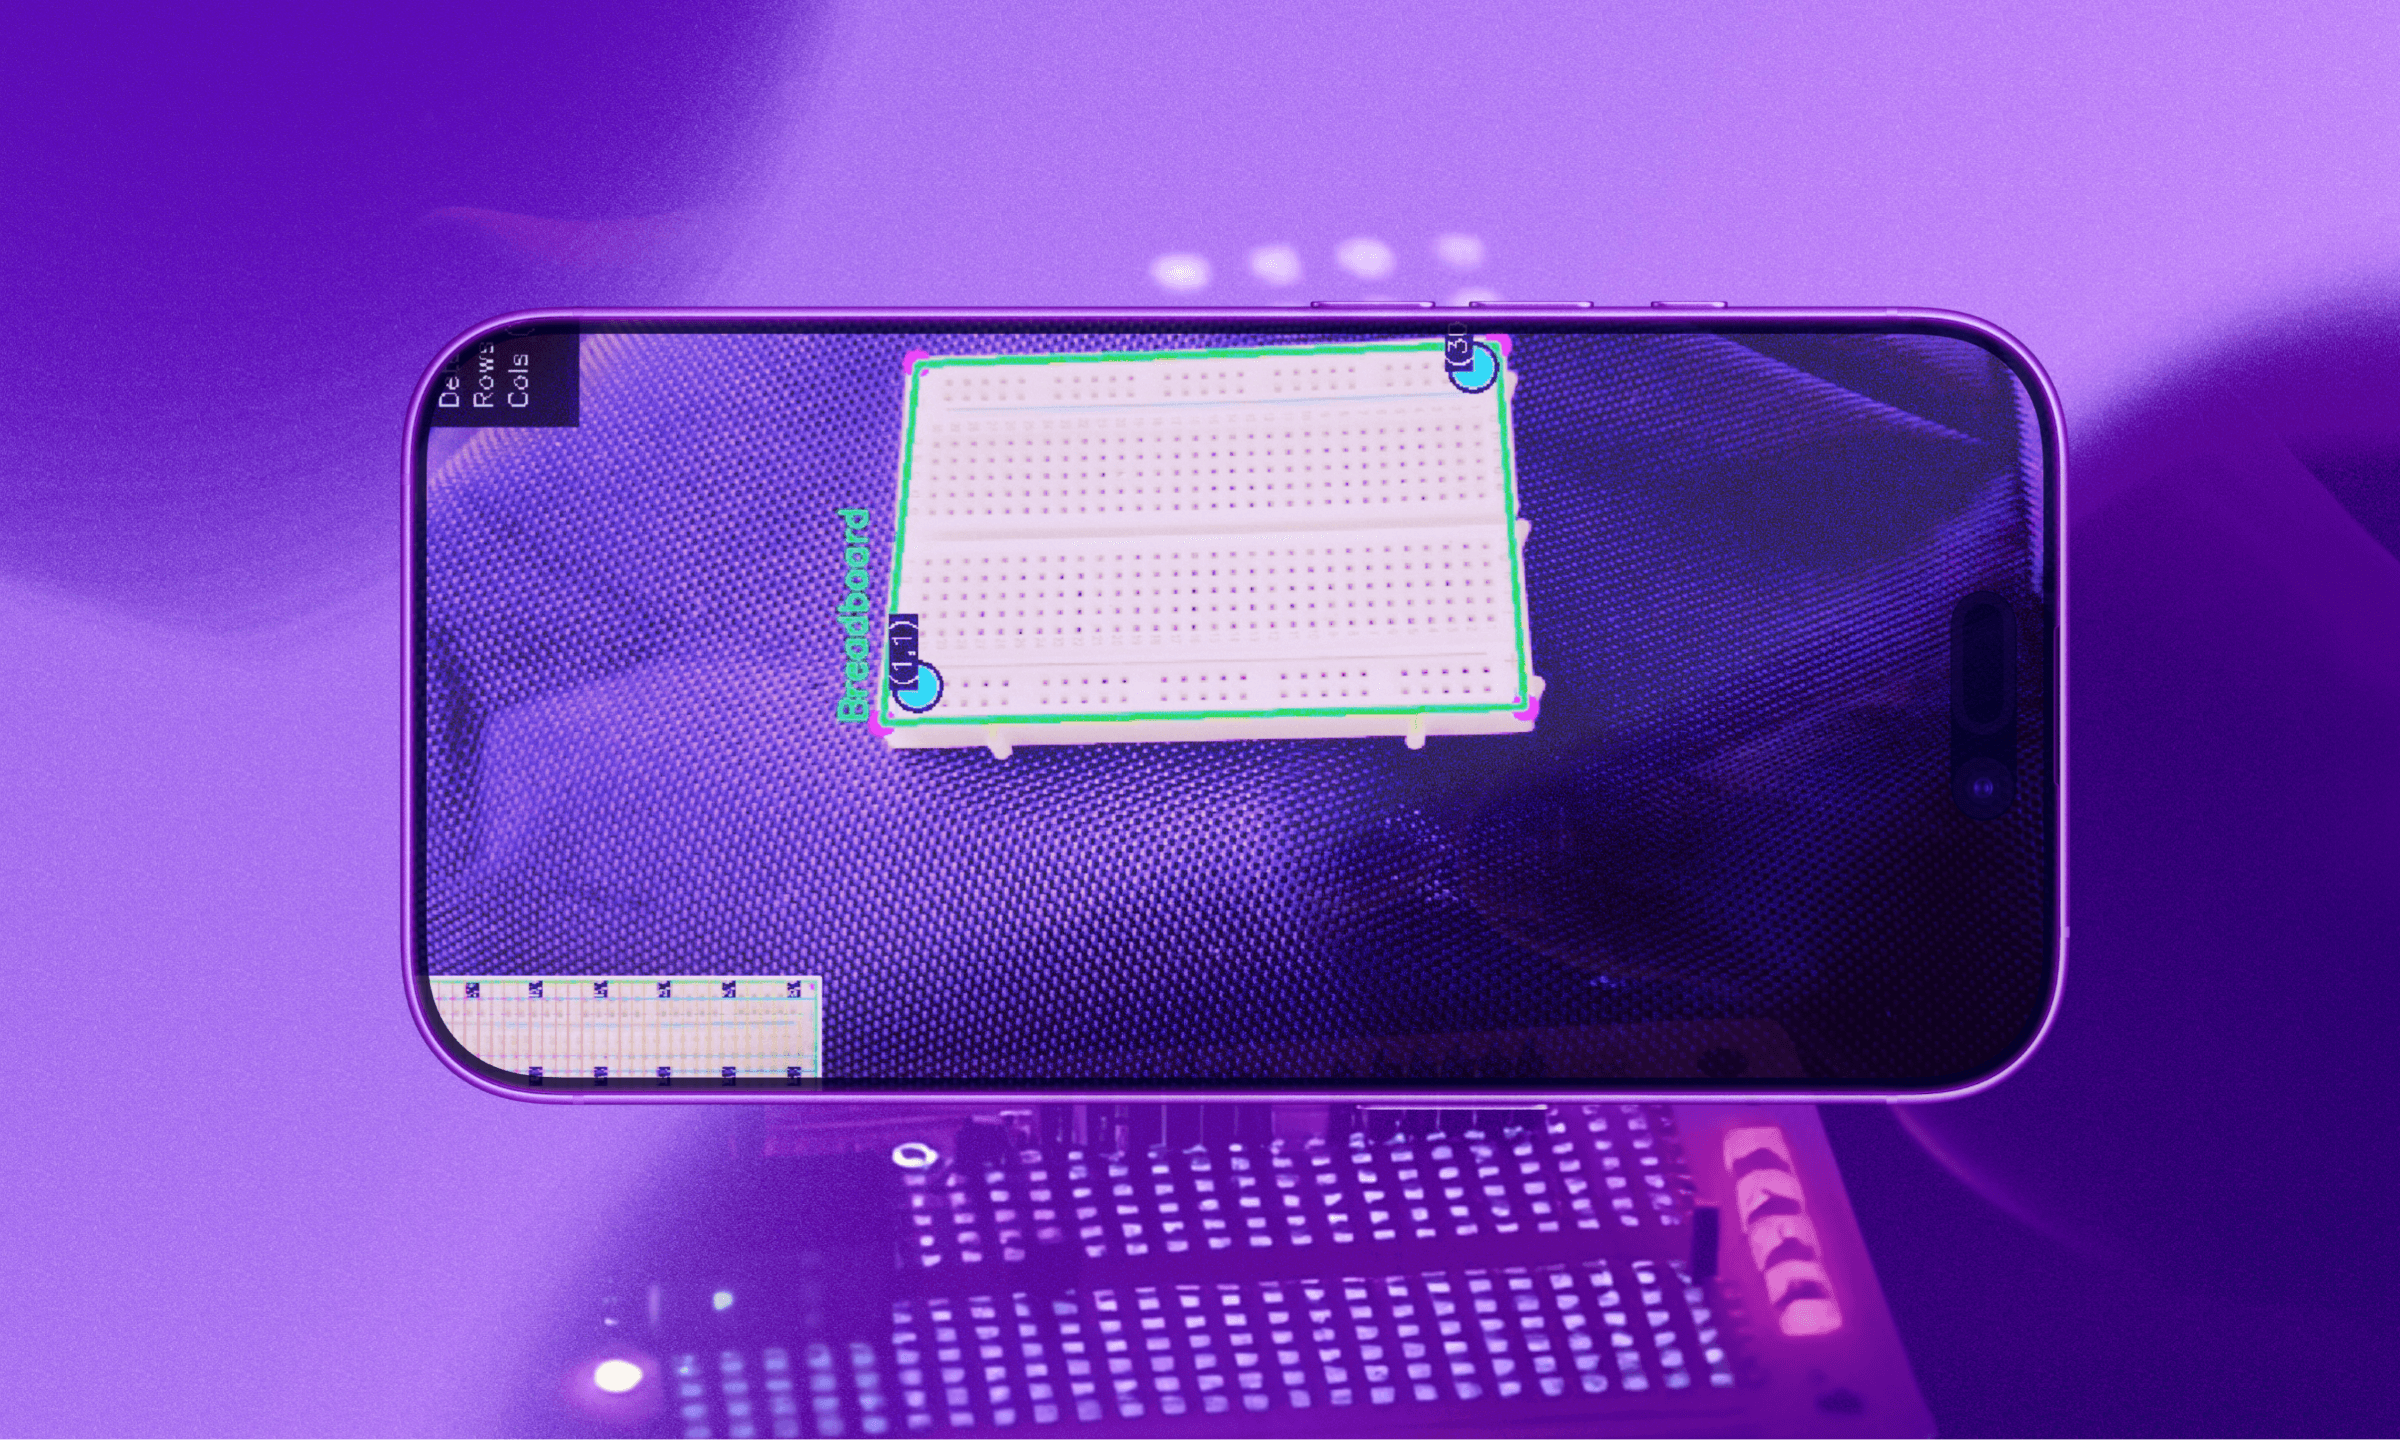
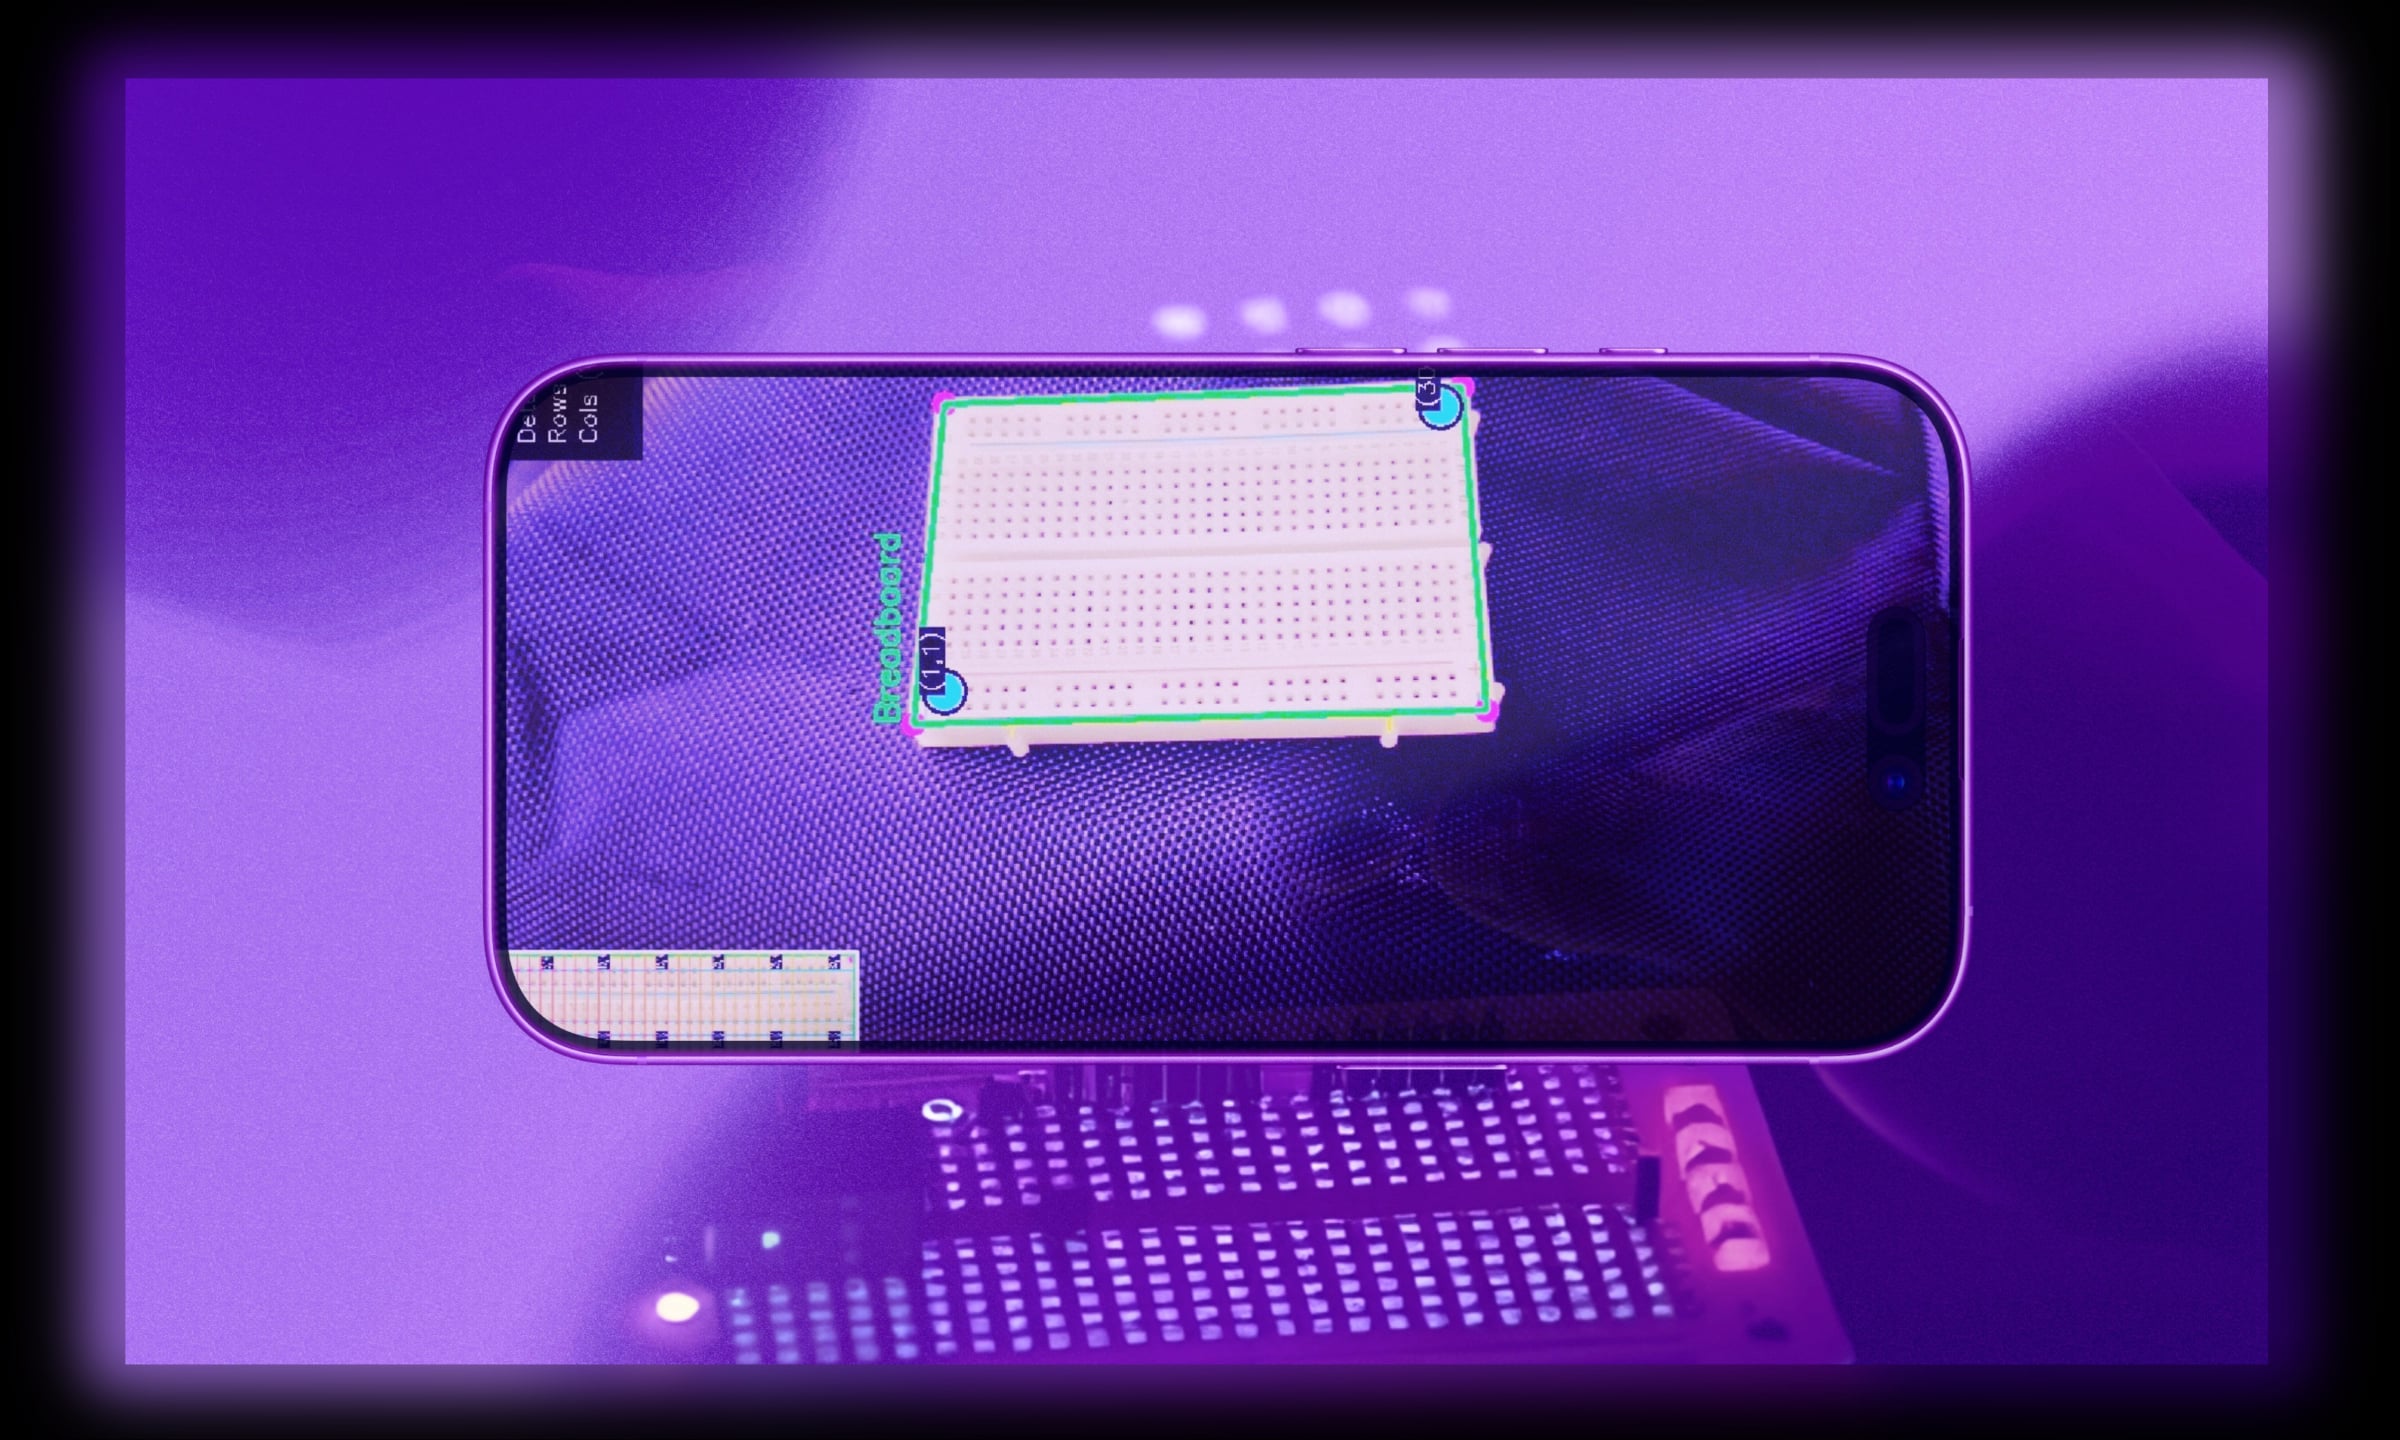
6 | mapping highlights back to camera viewwe detect everything in the warped view, but users see the camera feed. so we transform each highlight point back using the inverse matrix.
server/app/src/AR.ktprivate fun drawHighlightedPointsInOriginalView(rgba: Mat) {
if (inverseTransformMatrix == null) return
highlightedPoints.forEach { (row, col) ->
val warpedPoint = currentIntersectionMatrix[row][col]
warpedPoint?.let {
// Map from warped to original view
val originalPoint = mapPointFromWarpedToOriginal(it)
// Draw prominent marker
Imgproc.circle(rgba, originalPoint, 14,
Scalar(0.0, 0.0, 0.0), 2) // Black border
Imgproc.circle(rgba, originalPoint, 8,
Scalar(0.0, 255.0, 255.0), -1) // Cyan fill
// Add label
val label = "($row,$col)"
Imgproc.putText(rgba, label,
Point(originalPoint.x, originalPoint.y - 4),
Imgproc.FONT_HERSHEY_SIMPLEX, 0.5,
Scalar(255.0, 255.0, 255.0), 1)
}
}
}
the result: bright dots with coordinates that follow the breadboard as you move it around.
7 | interaction designux was still considered ofc:
server/app/src/AR.ktprivate fun setupHighlightingControls() {
// Auto-start highlighting
isHighlightingActive = true
cameraView.setOnClickListener {
if (isHighlightingActive) {
pauseResumeHighlighting()
} else {
togglePinHighlighting()
}
}
cameraView.setOnLongClickListener {
if (isHighlightingActive) {
jumpToNextComponent()
true
} else false
}
}
status displays at the top show whether you're paused, and component progress is shown in the bottom right.
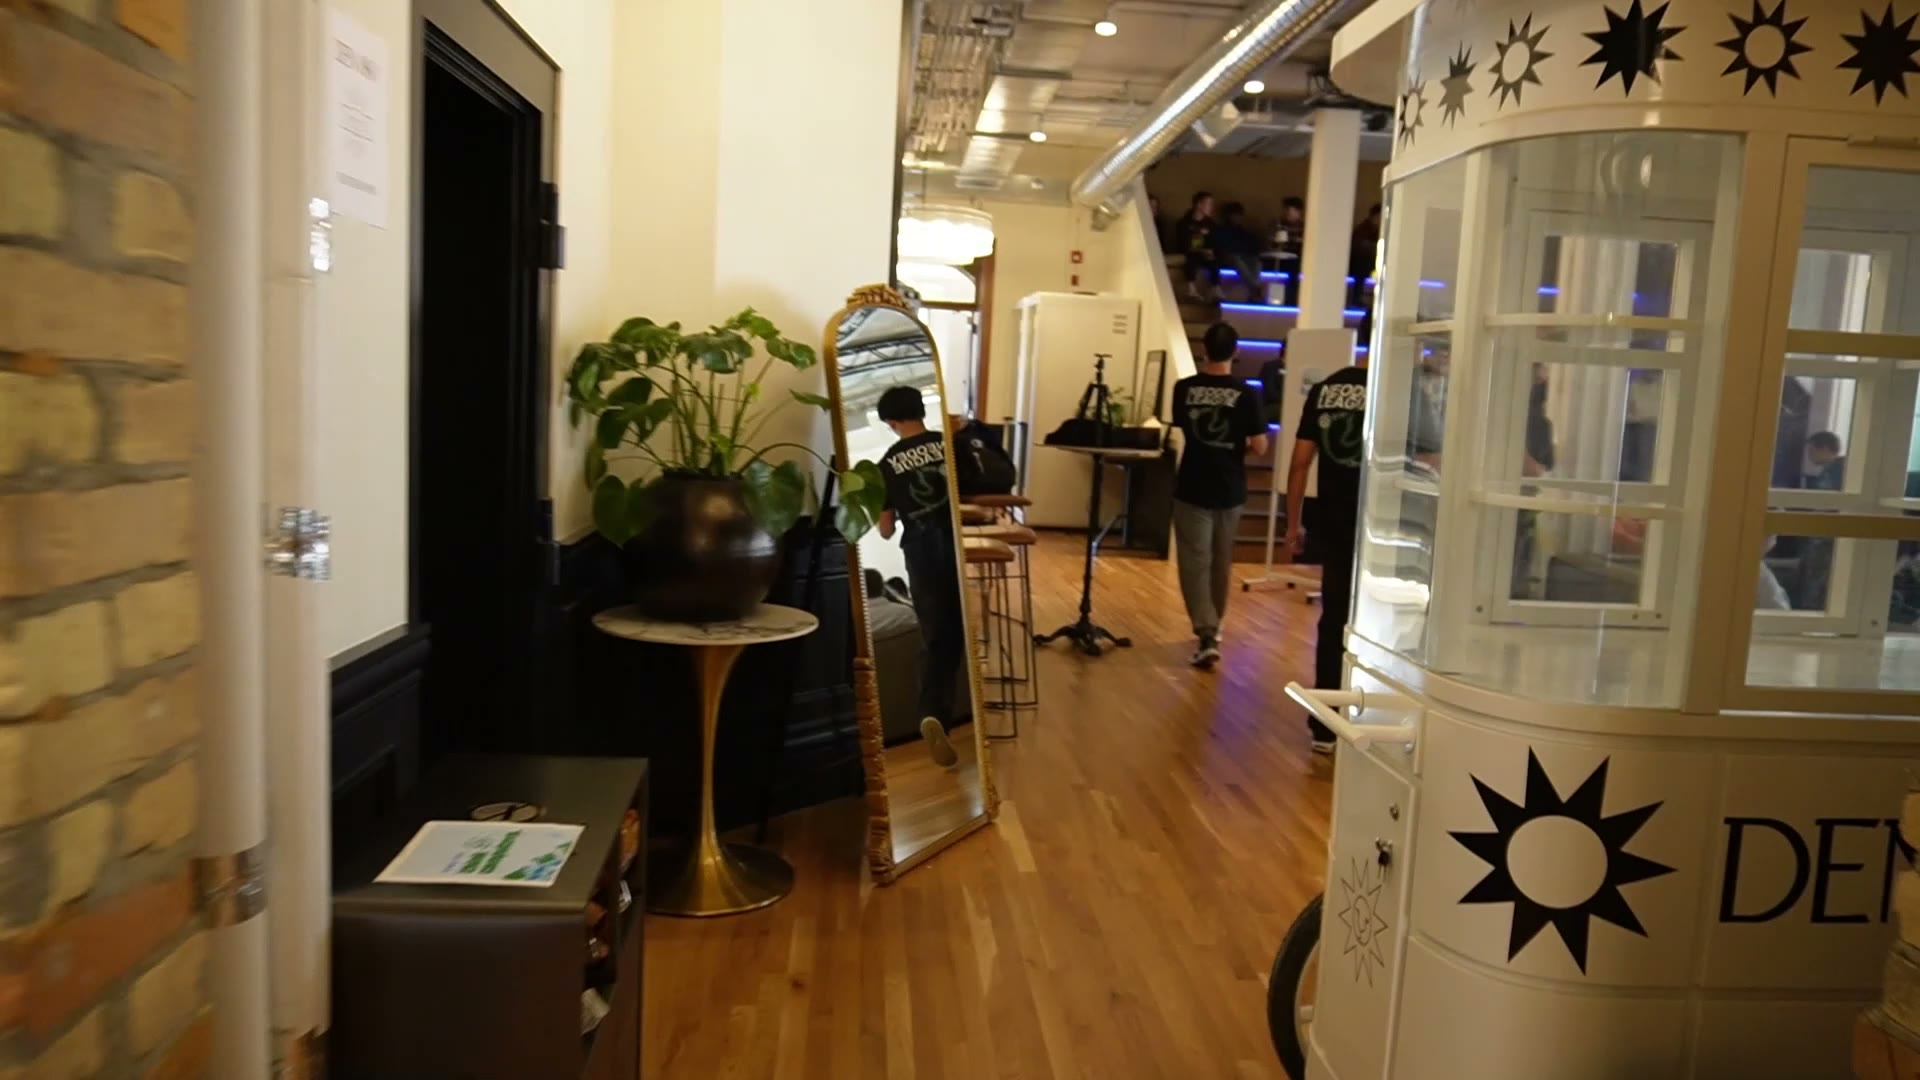
we created a functional prototype within 36 hours and won second at jamhacks x.
there was real potential to ship guideline. however, this was during may of high school senior year so we were in full senioritis mode 🙏. anyways, heres a short clip to prove that it was functional: